0

Dreamcast PicoPSU Installation

This guide will help you install the Dreamcast PicoPSU. It can also be used as a reference for a power supply replacement or a DreamPSU installation although what you are installing will be different the steps will be the same. The picoPSU is our recommended power supply upgrade over any other power supply upgrade. It is a very easy plug and play installation that any level of modder can accomplish. It is useful for:

  1. Fixing a Dreamcast that will not power on due to a dead power supply
  2. Reducing heat in your Dreamcast due to a GDEMU or other optical drive emulator (ODE) which cause the power supply to overheat. Or just reducing heat in general regardless of if you have a GDEMU or not.
  3. Making your Dreamcast compatible with any region power plug (for example if you wanted to use a Japanese console in the USA or vice versa).

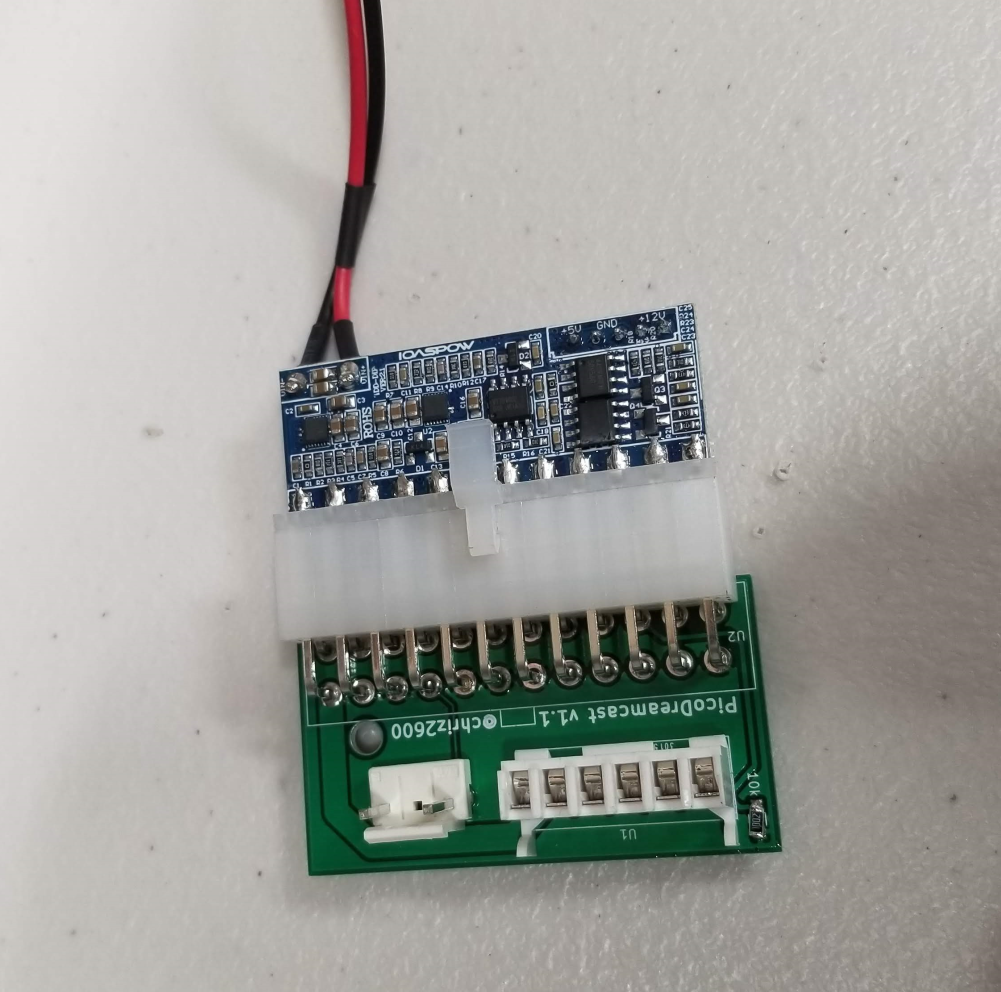
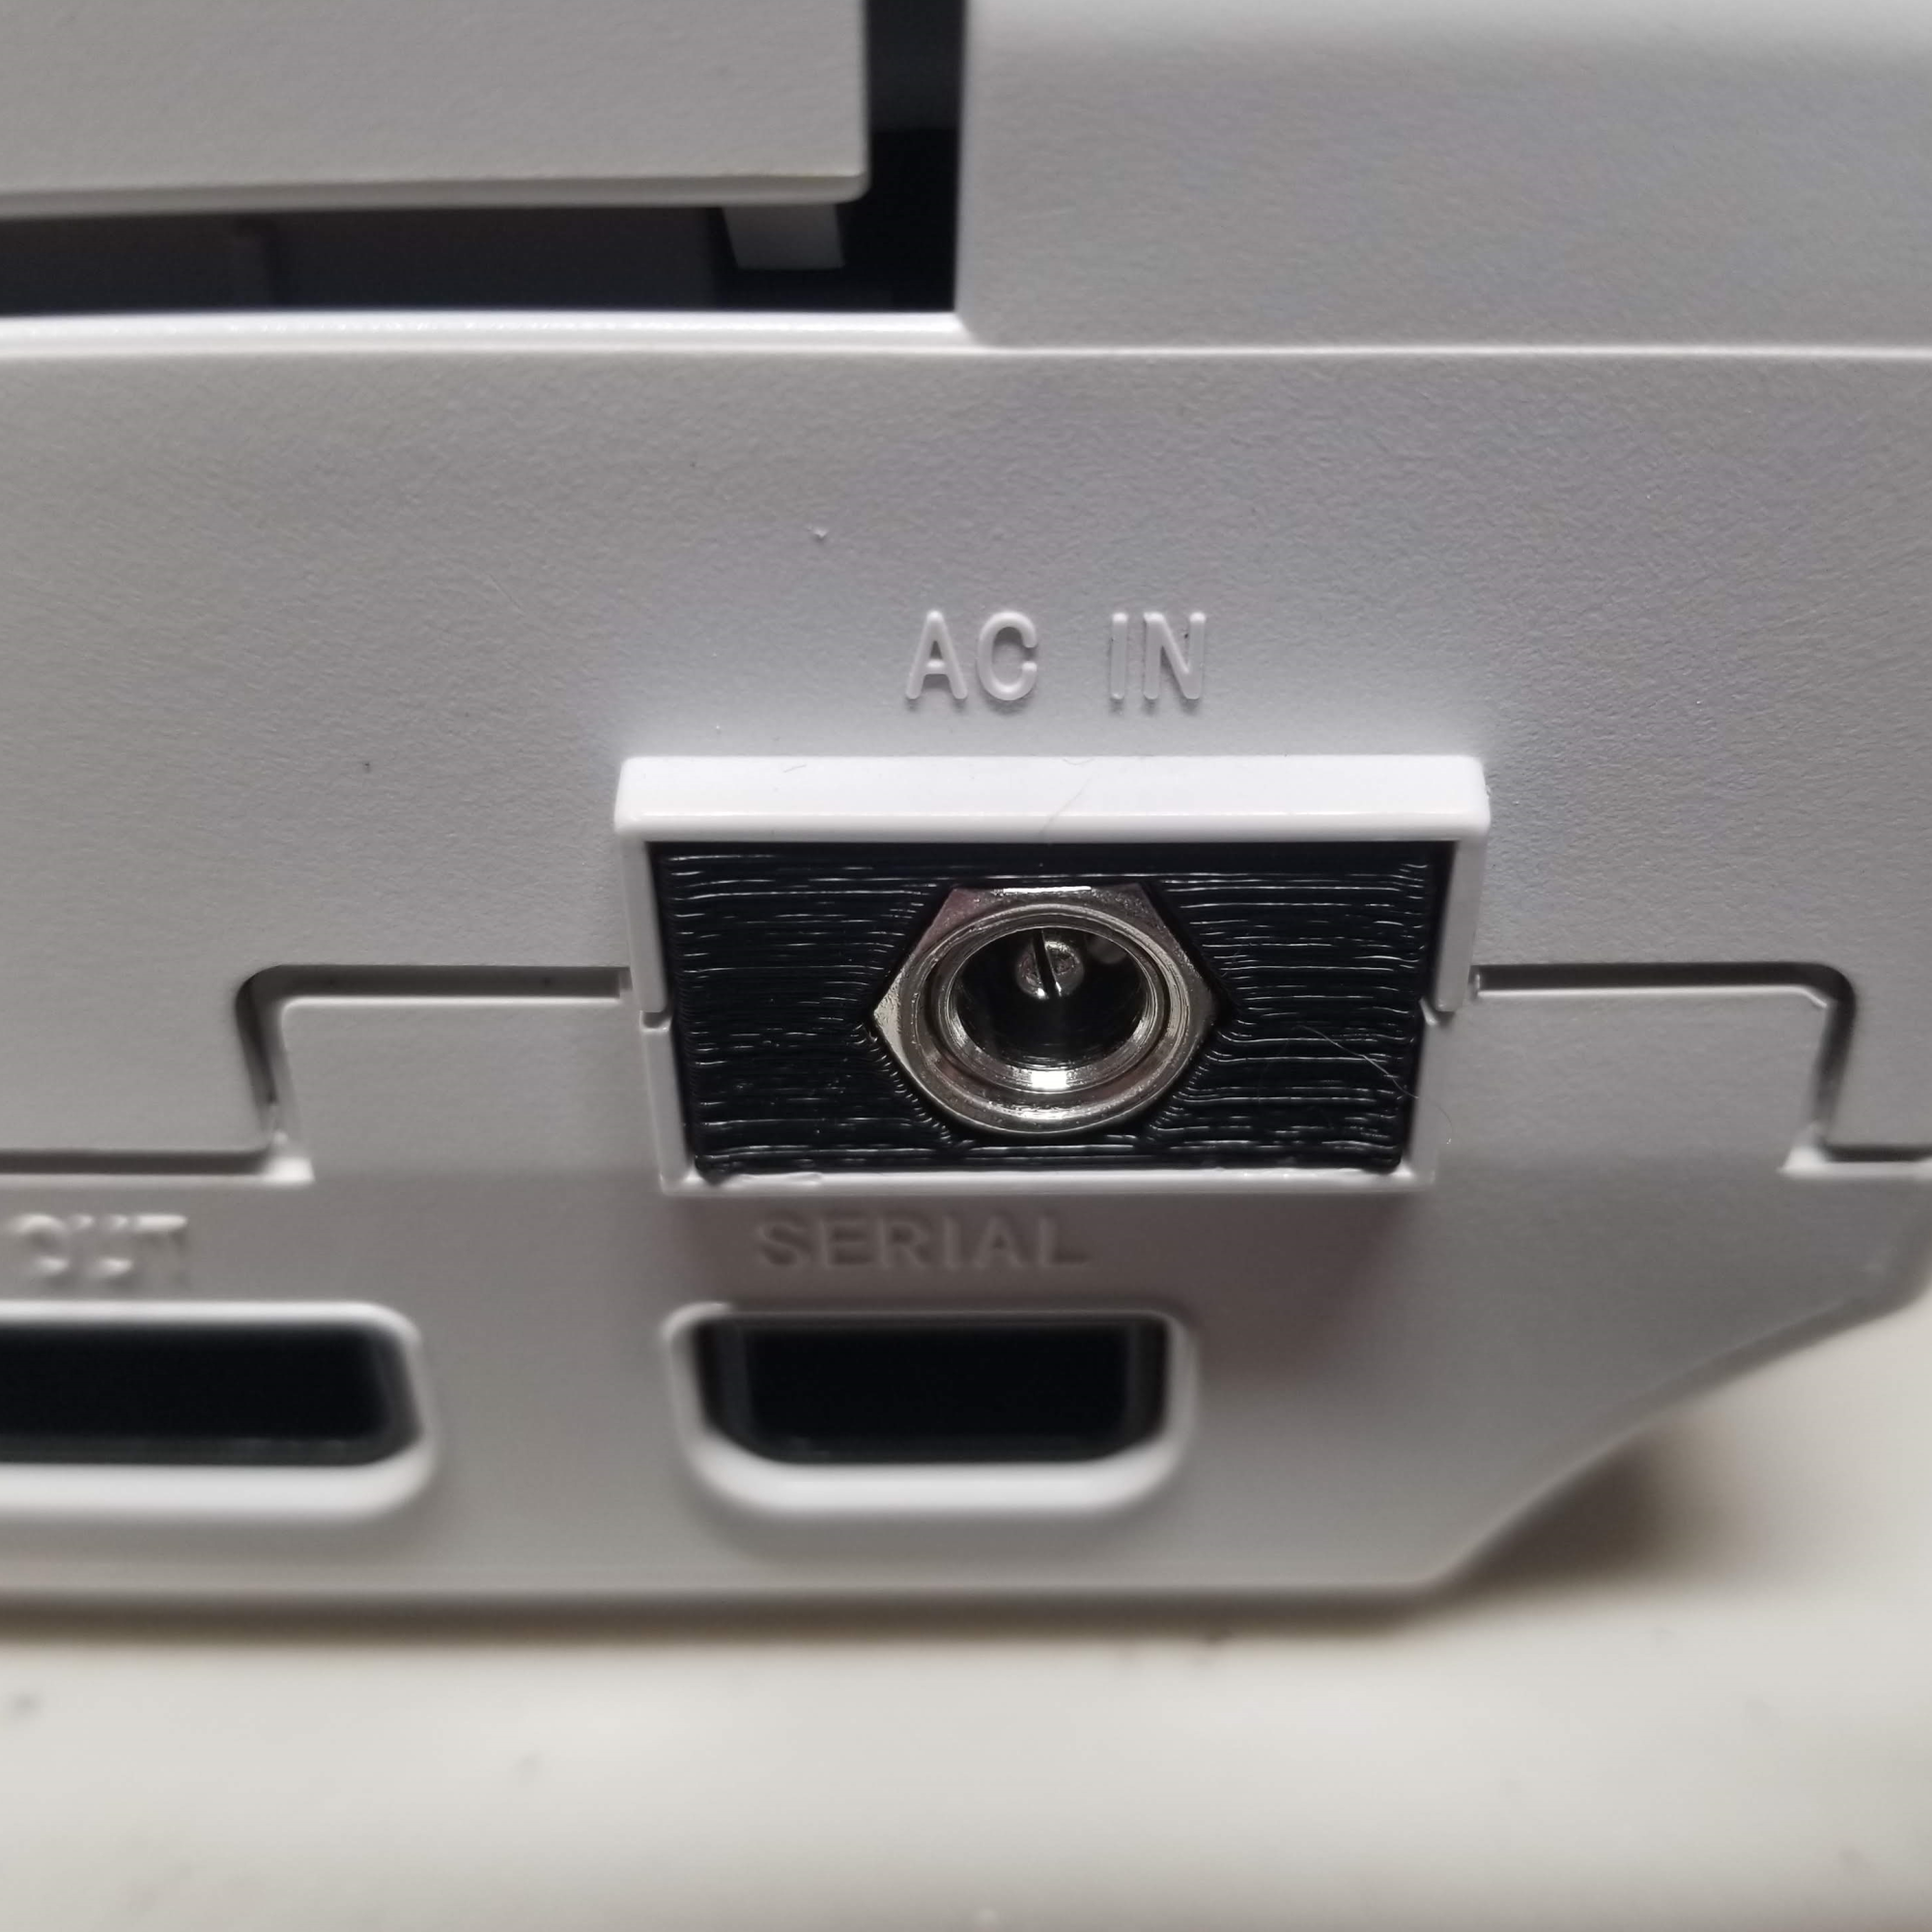
A note about item #3 above: The PicoPSU takes a 12V power input, which is a common power cable that many laptops use. Here is an example of the power cable for a PicoPSU. These kinds of cable adapters can take 100-240V input and convert it to 12V, you only need the proper plug for your region. You can also easily find this same cable adapter with the plug for your region. The standard Dreamcast power supply that it came with originally is only able to take the power for the region it was sold in. So even if the plug fits, it is dangerous to operate a Dreamcast in any region other than the one it was sold in unless you change the power supply to a PicoPSU, a DreamPSU or a power supply made for the region you are operating it in. Of course you can always get a special voltage adapter but that will not be discussed here.

Tools Required for the Mod
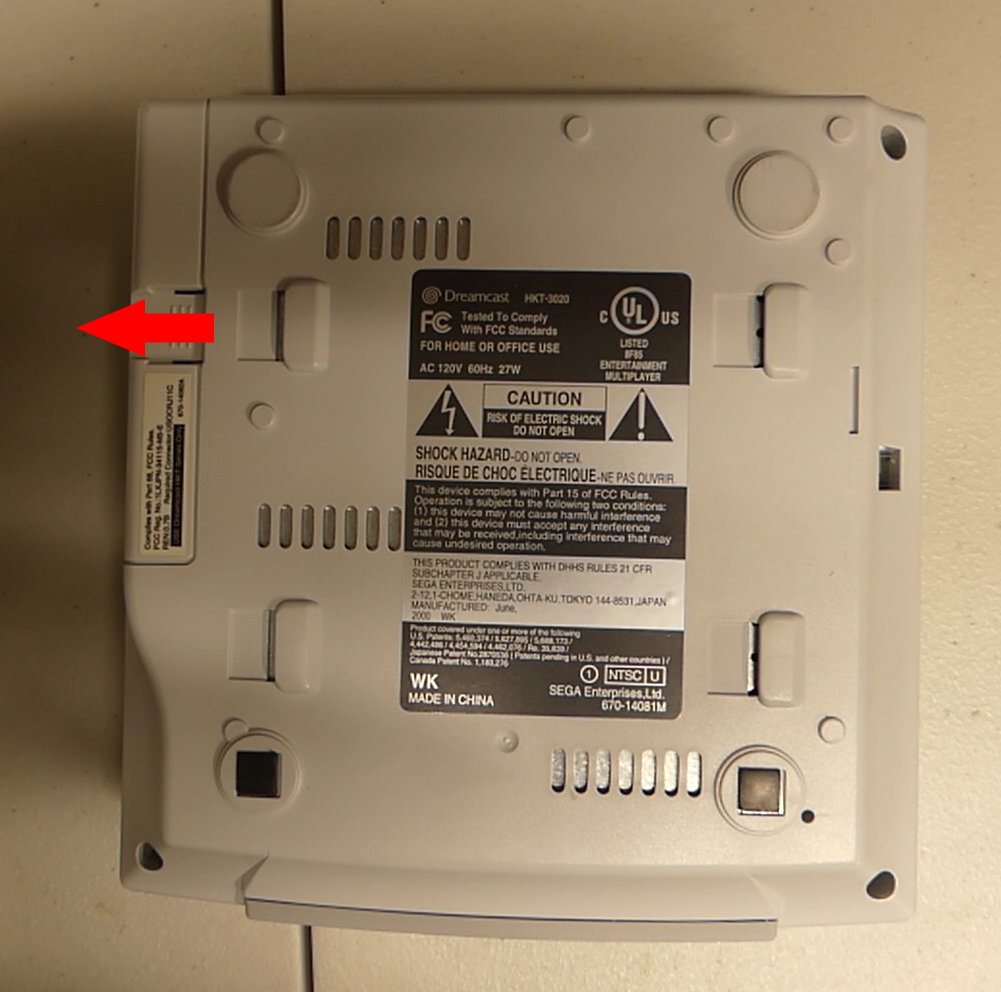
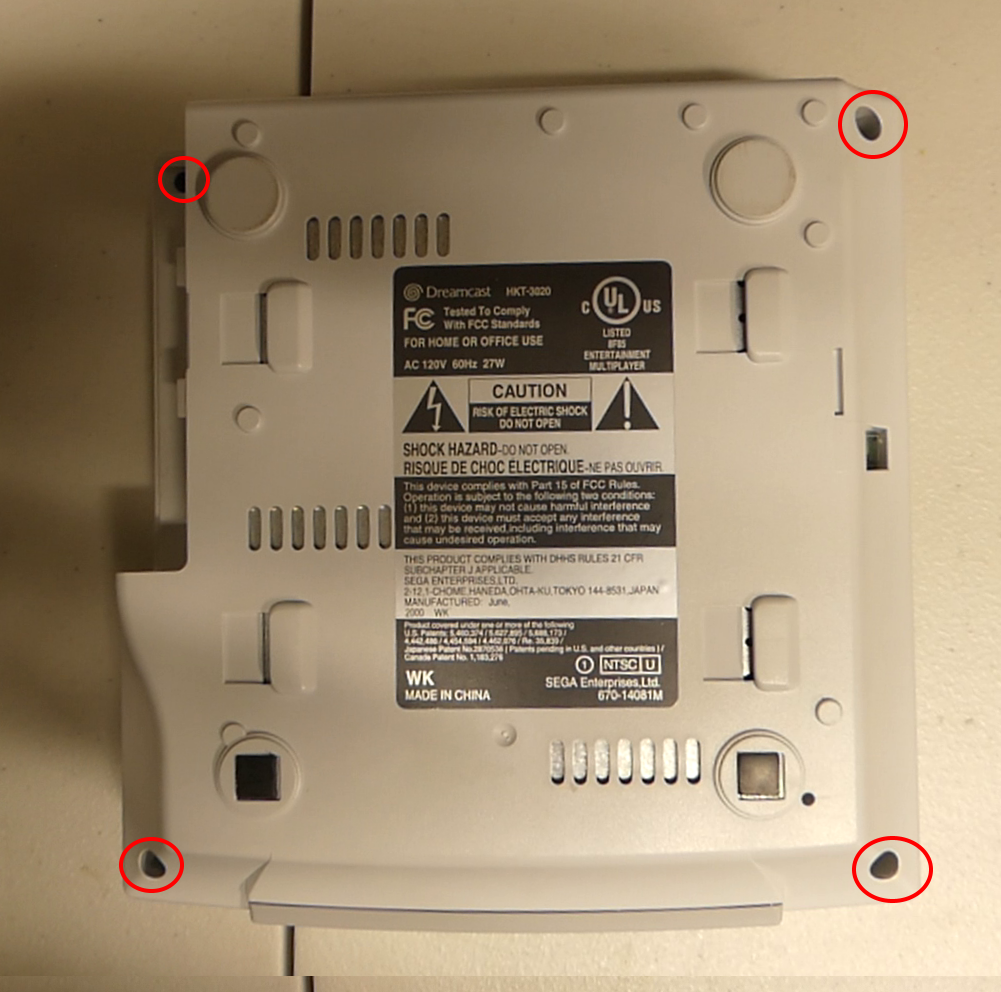
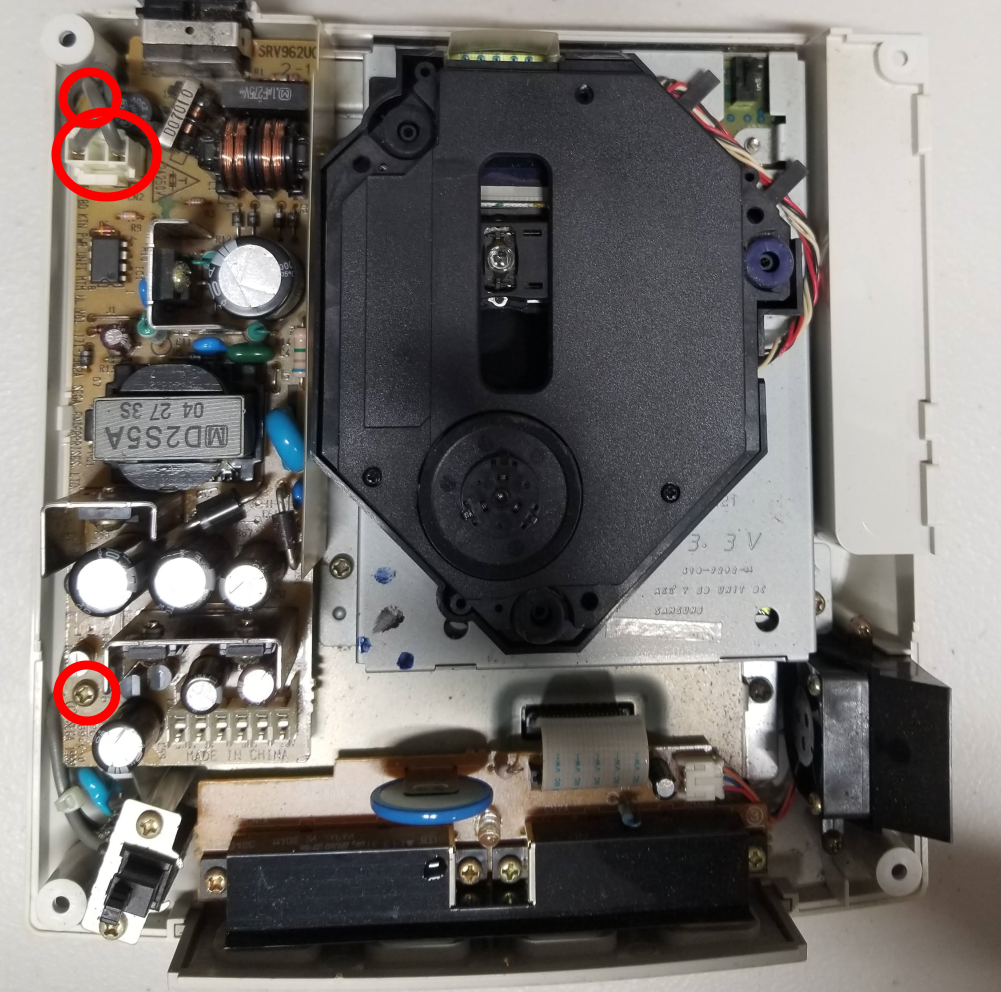
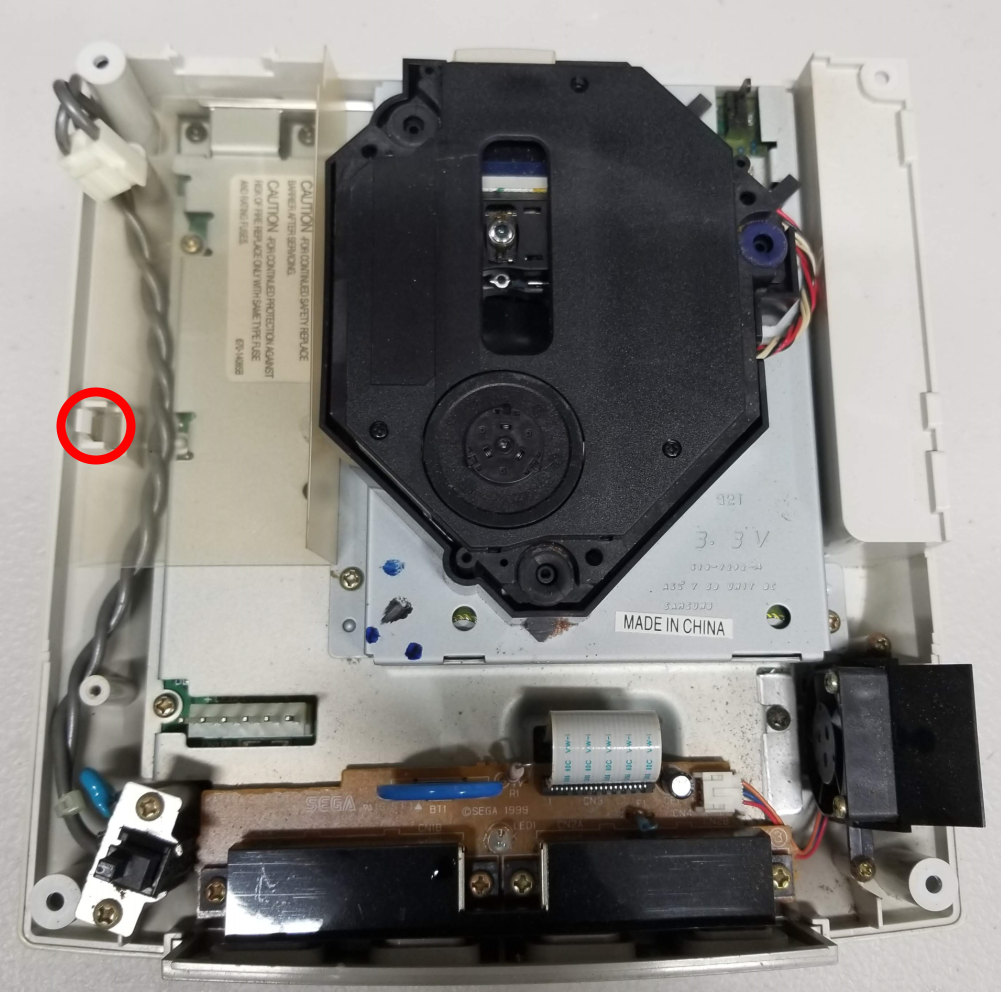
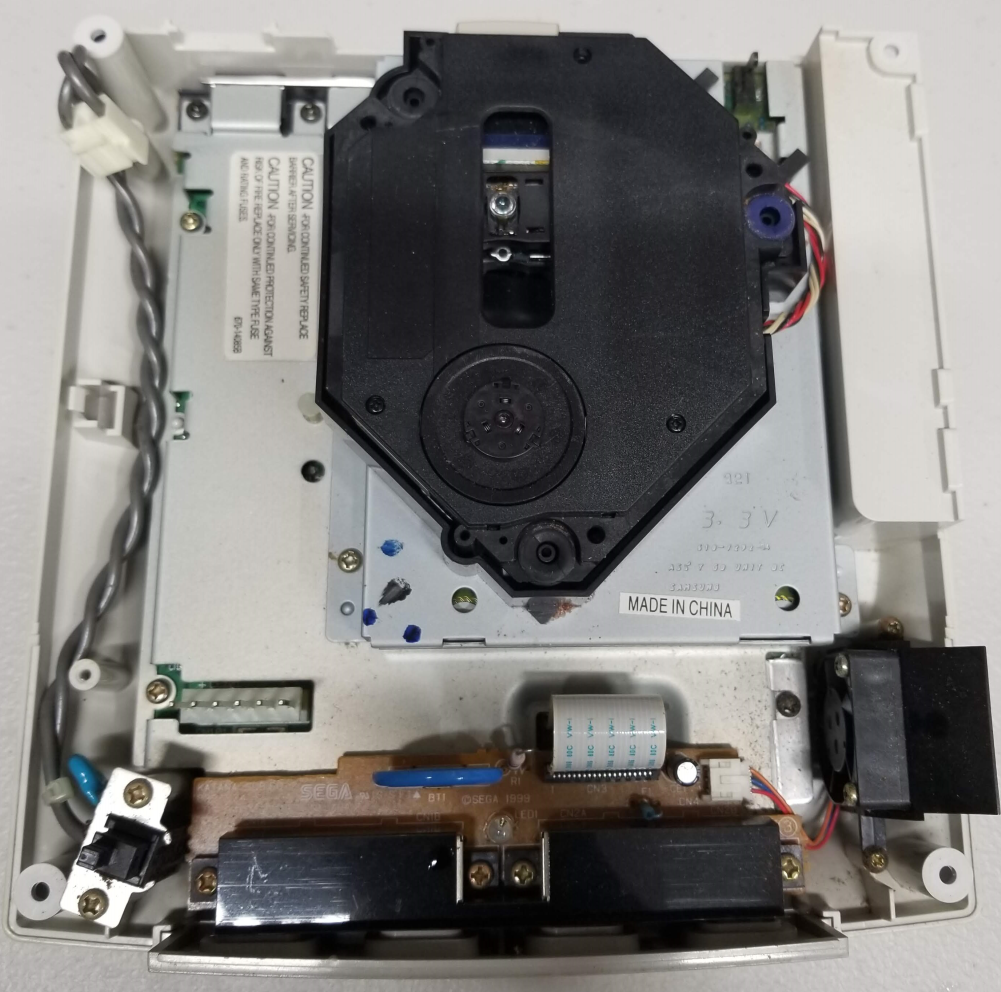
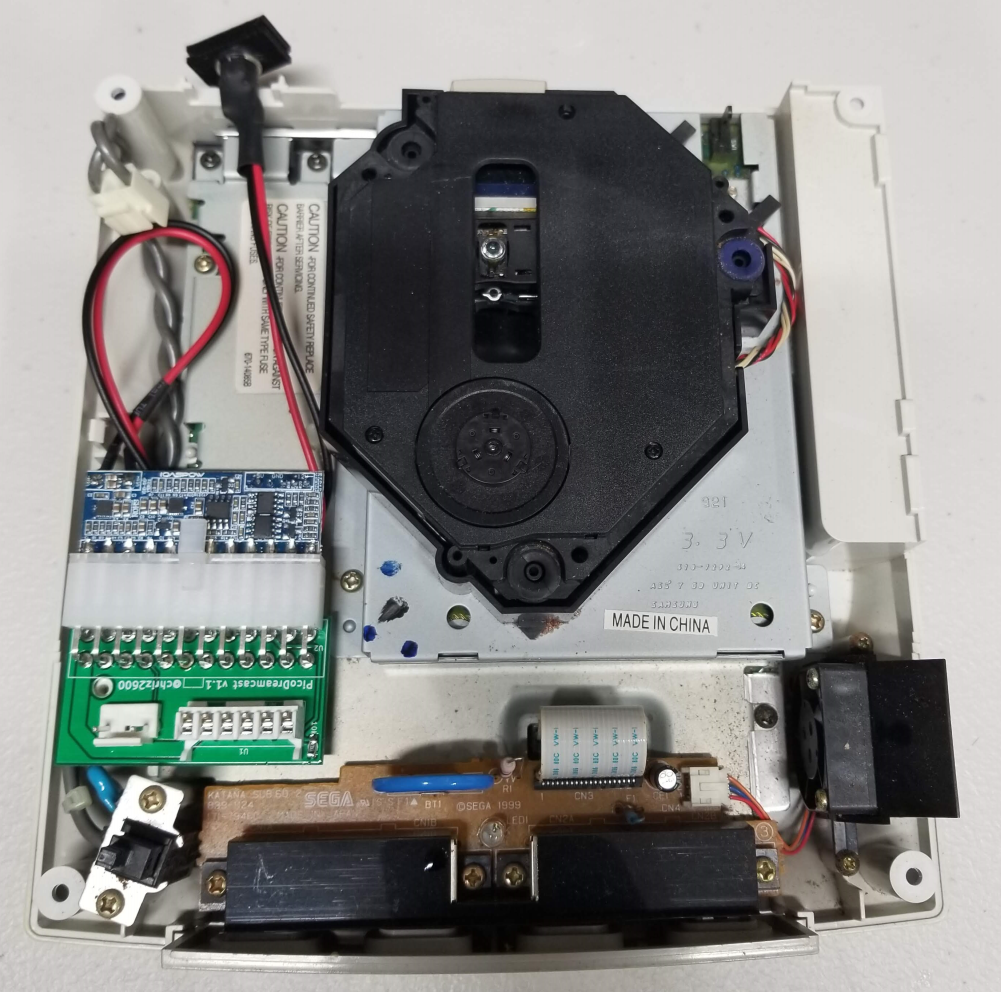
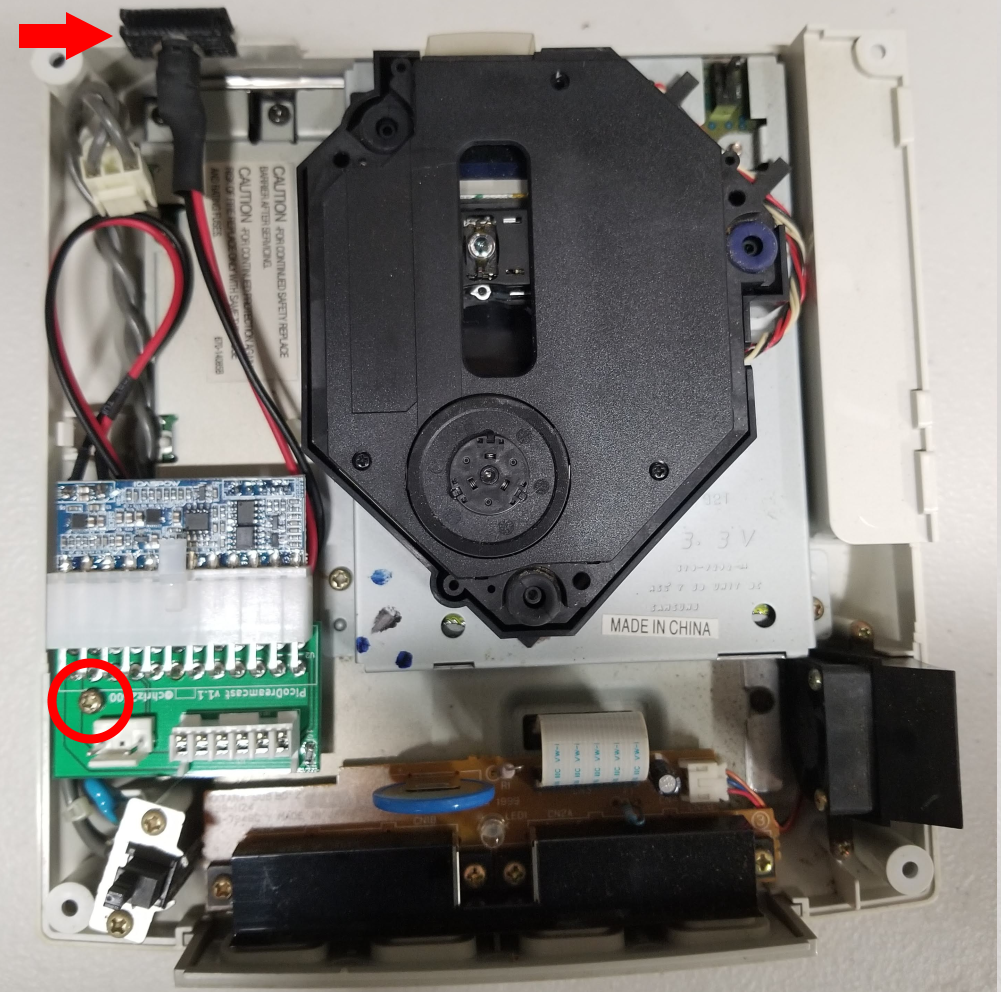
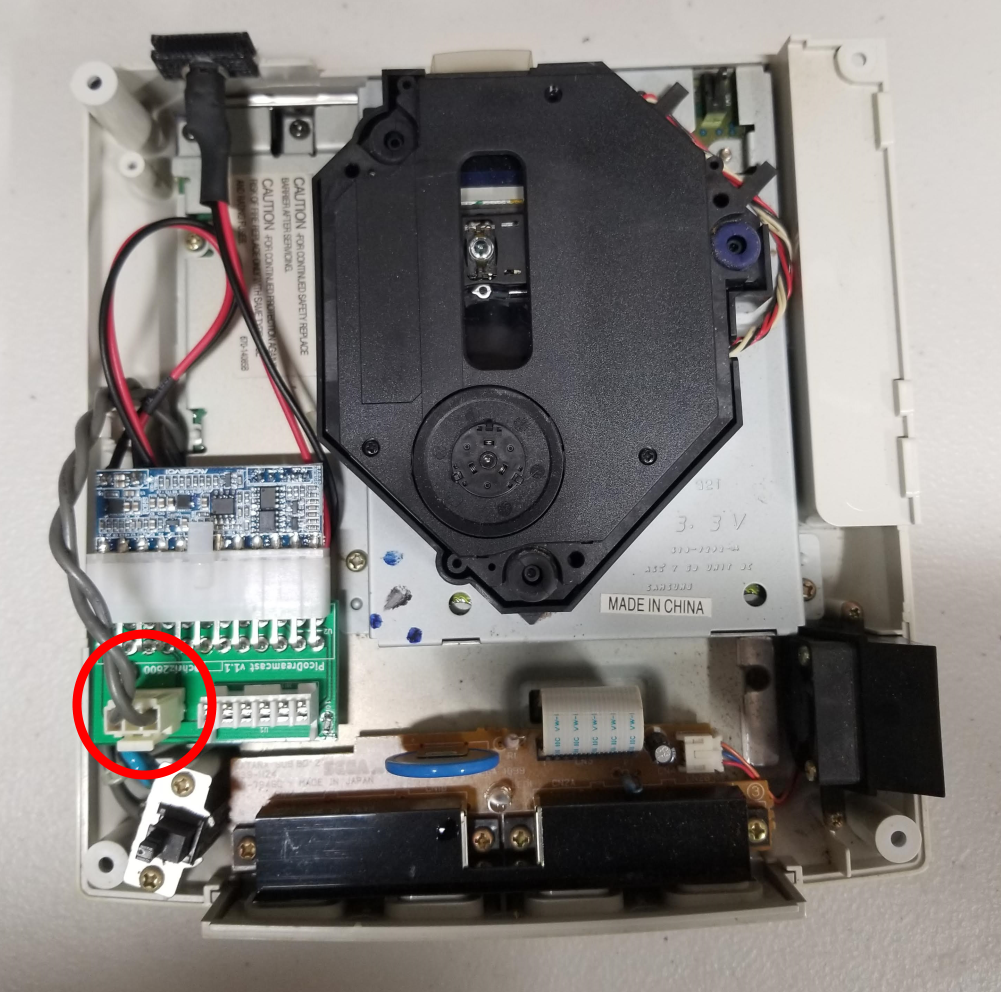
  • PicoPSU (or other power supply)
  • Power adapter for the PicoPSU such as this
  • Phillips screwdriver
  • Your Dreamcast

Now Lets Get To It

Pro Tip: An easy way to follow this guide is just to click the first image and use the arrows to go through each step.

First you are going to want to remove the modem by pushing the bottom part and sliding it out

Then you can remove all four screws holding the top shell on. Turn the Dreamcast back over and lift off the top shell.
Now take a look at the power supply on the left side of the console. This is the NTSC model, with other regions it will look a little different but the procedure is the same. Remove the screws outlined and unplug the power switch that is circled.
You can now pretty easily pull the power supply out of the console, you will have to push the tab slightly (circled) to get it to come out. It is relatively safe to handle the power supply but there can still be some charge in the capacitors so it is good practice to handle the power supply by the edges and try not to touch any of the components.
Now there is a plastic shield under the old power supply. This is to help with airflow and keep the power supply from shorting out on the metal heatsink that is below it. Since heat is no longer an issue with the picoPSU and the picoPSU is significantly smaller than the original PSU I usually remove it. You can choose to keep it in but the plastic shield doesn’t stay down like it should without the original power supply so it’s just easiest to remove it.
Let’s prepare the picoPSU for installation. There is a black 3D printed plug adapter that comes with it. First you will want to connect that to the plug by first removing the nut from the plug, pushing the plug through the 3d print, and putting the nut back on. Sometimes the plug will have a washer that you should remove before putting everything together.
If your picoPSU isn’t already plugged into the Dreamcast PSU adapter, plug them together. Some PicoPSUs have only 20 pins which is a different number of pins than the PicoDreamcast adapter. In this case take a look at the last photo and it will show you how to align everything. Since the pin housing is shaped it should only fit together one way although I have seen some plugs that can be forced into fitting wrong.
Go ahead and slot the picoPSU into the Dreamcast by lining up the power pins into the pin holes on the PicoPSU. You can leave the gray cable for the power switch running under the picoPSU.
Slot the power plug onto the shell of the Dreamcast and secure the picoPSU into place with one of the screws from the original power supply.
Plug the power switch into the picoPSU board.
Give the console a test run and you should be good to go! Reassemble the top shell with the 4 screws, replace the modem and your done!!

If you have the 20 pin PicoPSU this is how you plug it in to your picoDreamcast. Please note that the locking tab does not line up but the top edge does line up.

Congrats you just upgraded your Dreamcast!

The Video

A video version is coming soon!

Close Bitnami banner
Bitnami