0

Dreamcast GDEMU Installation With Top Loading Tray

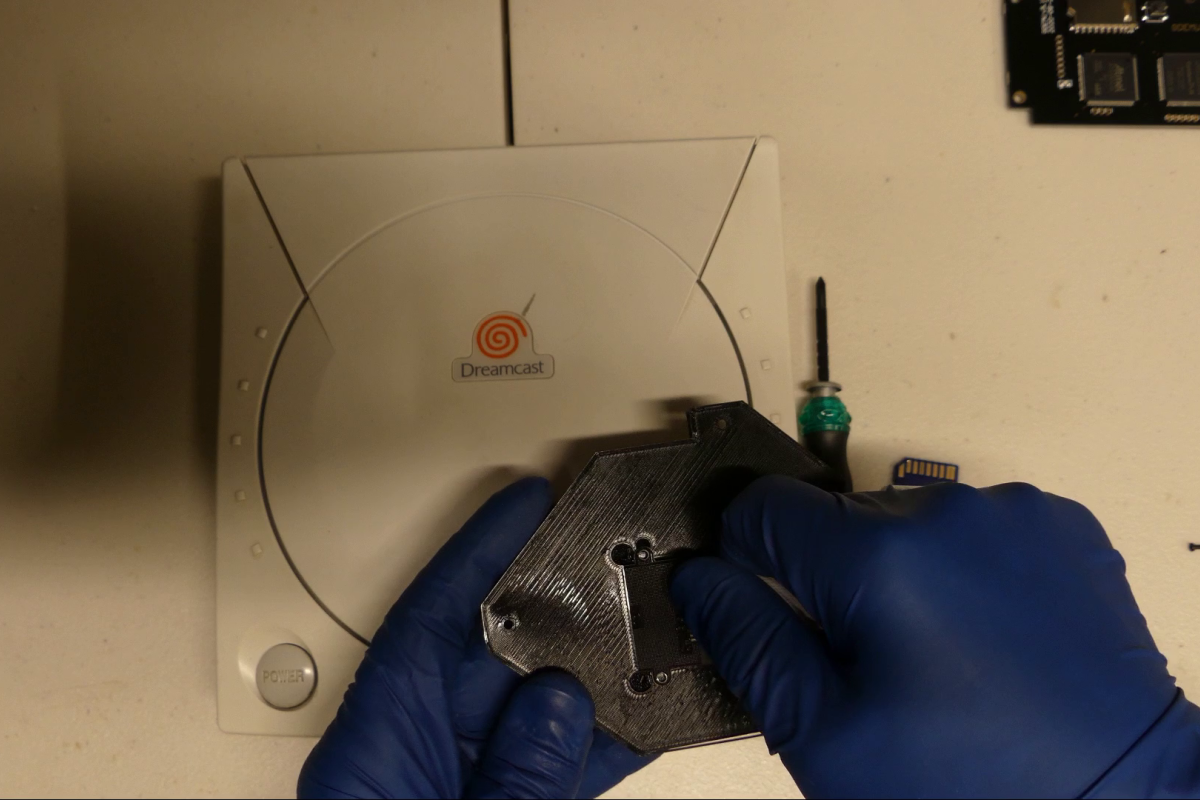
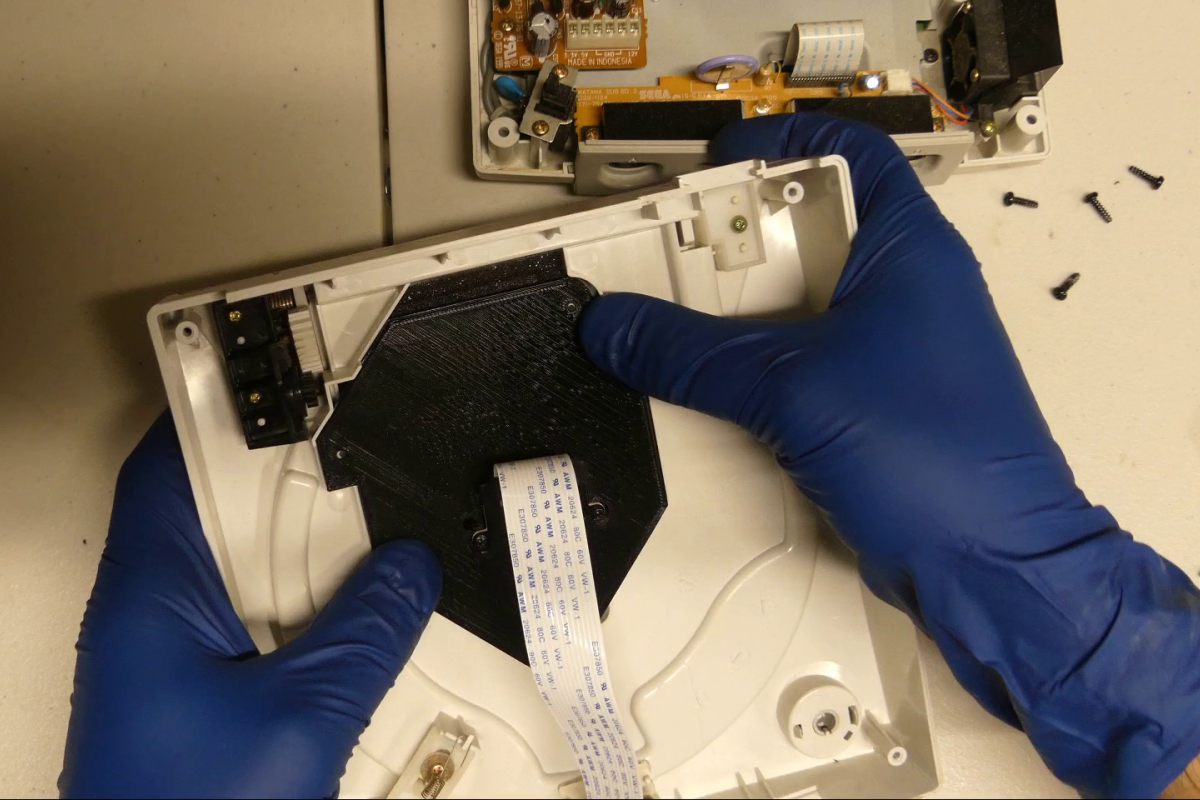
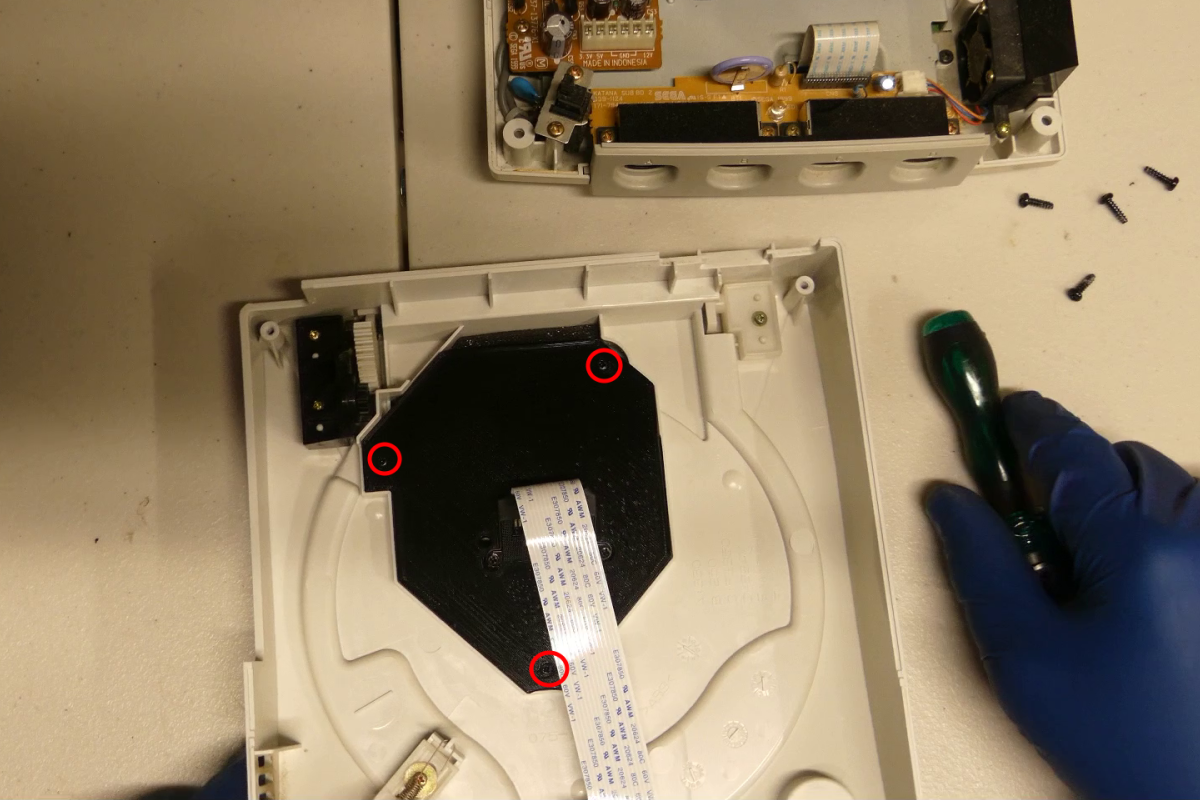
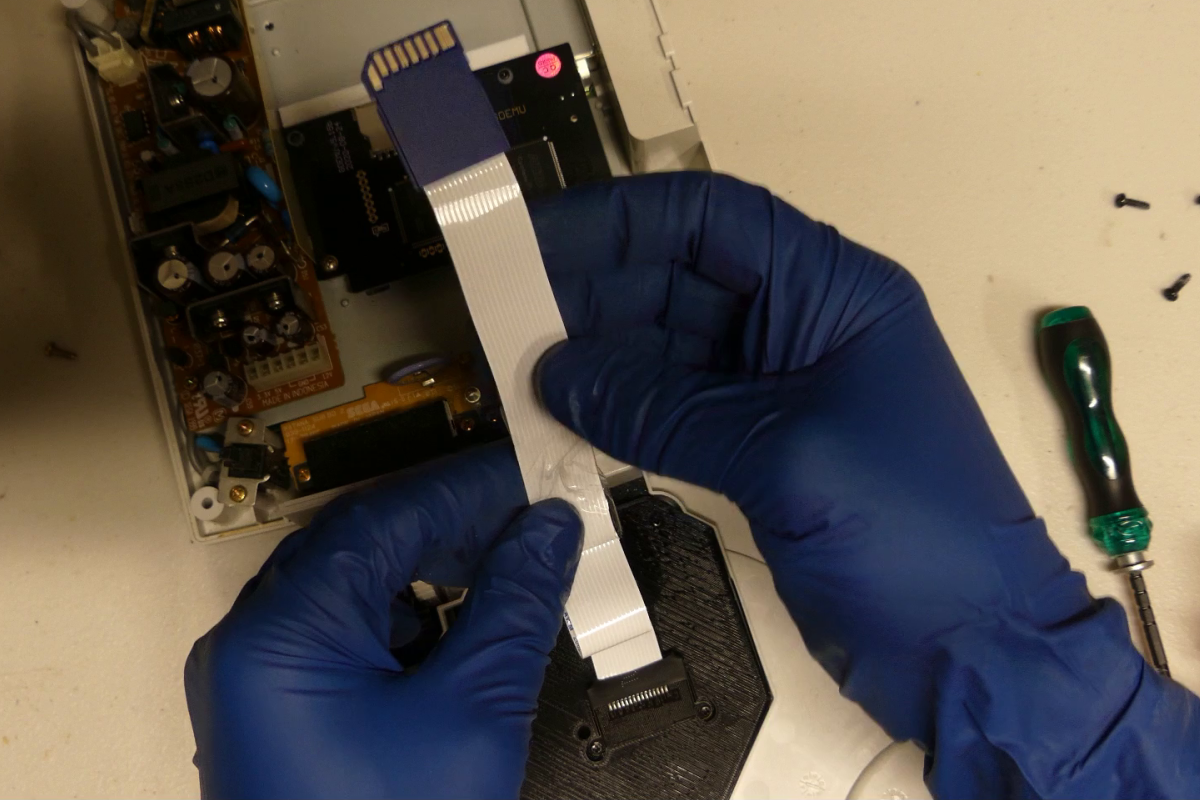
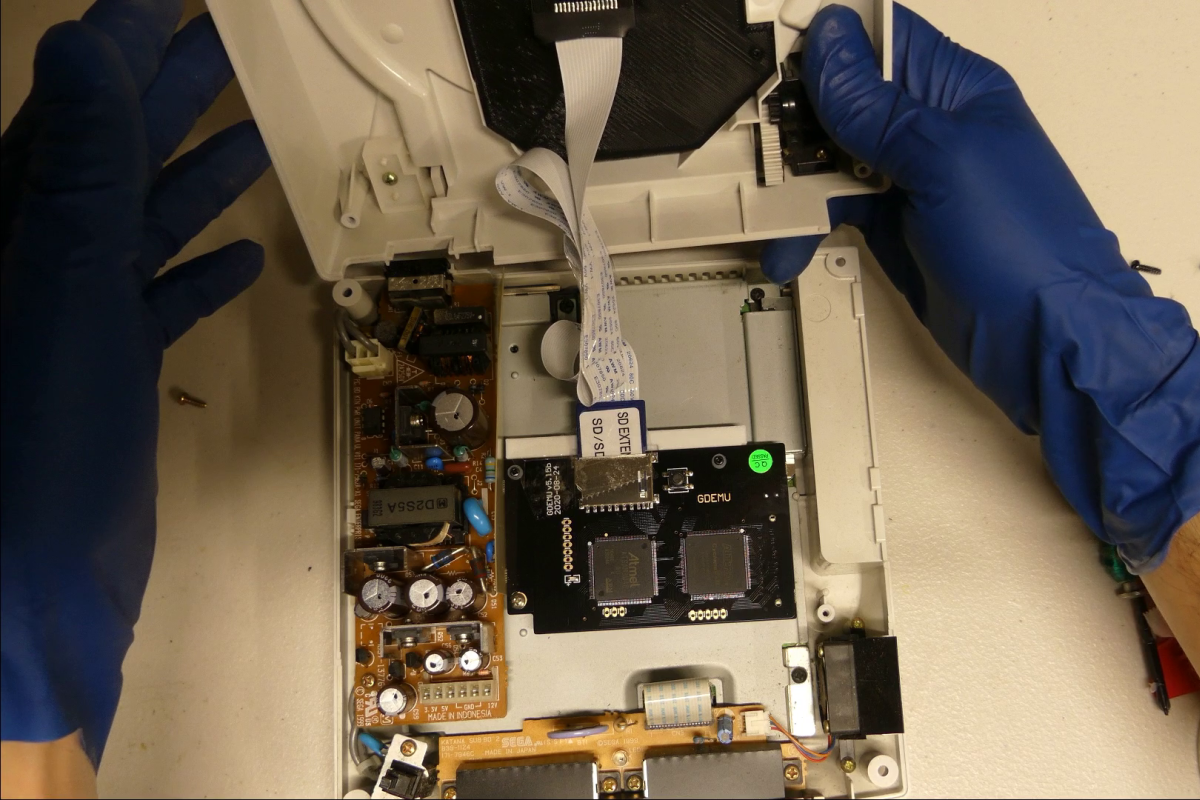
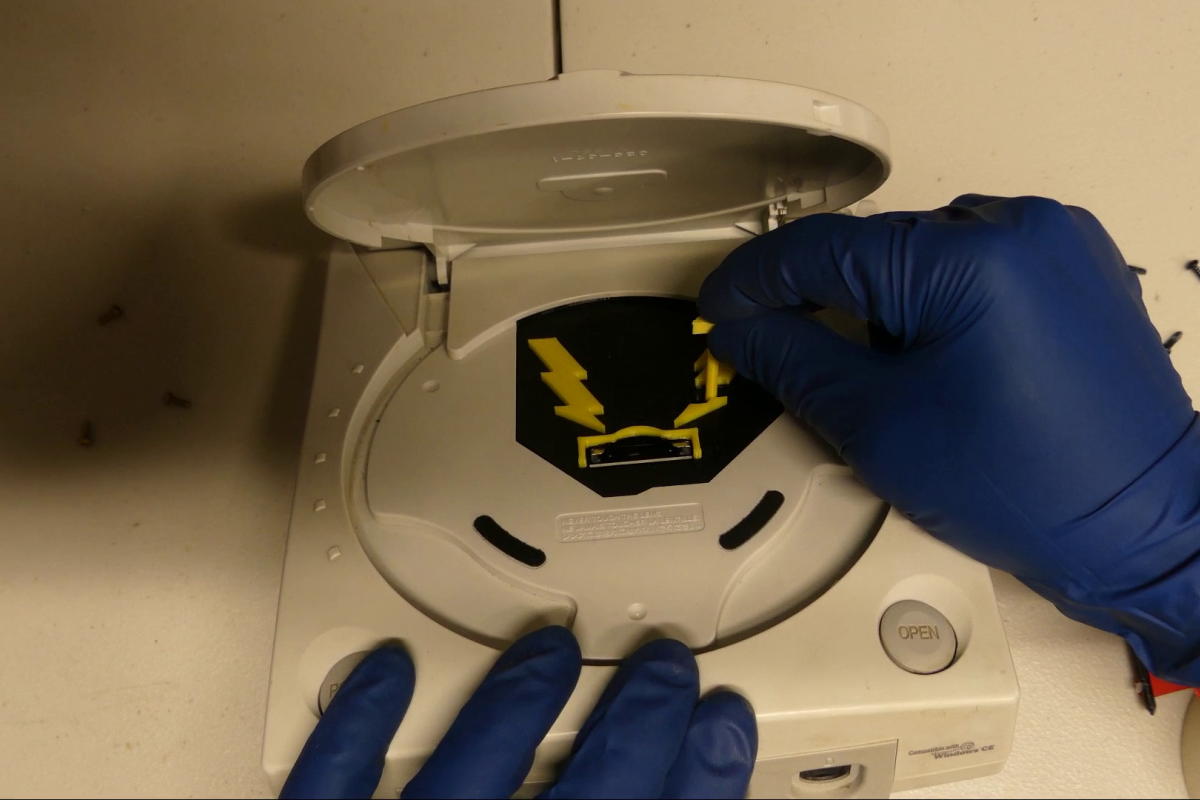
This guide will help you install your GDEMU in your Sega Dreamcast as well as install an SD extender top loading style tray such as this. These trays are available in various colors/styles and give easy access to the SD card and keep you from dropping the SD card into your console.

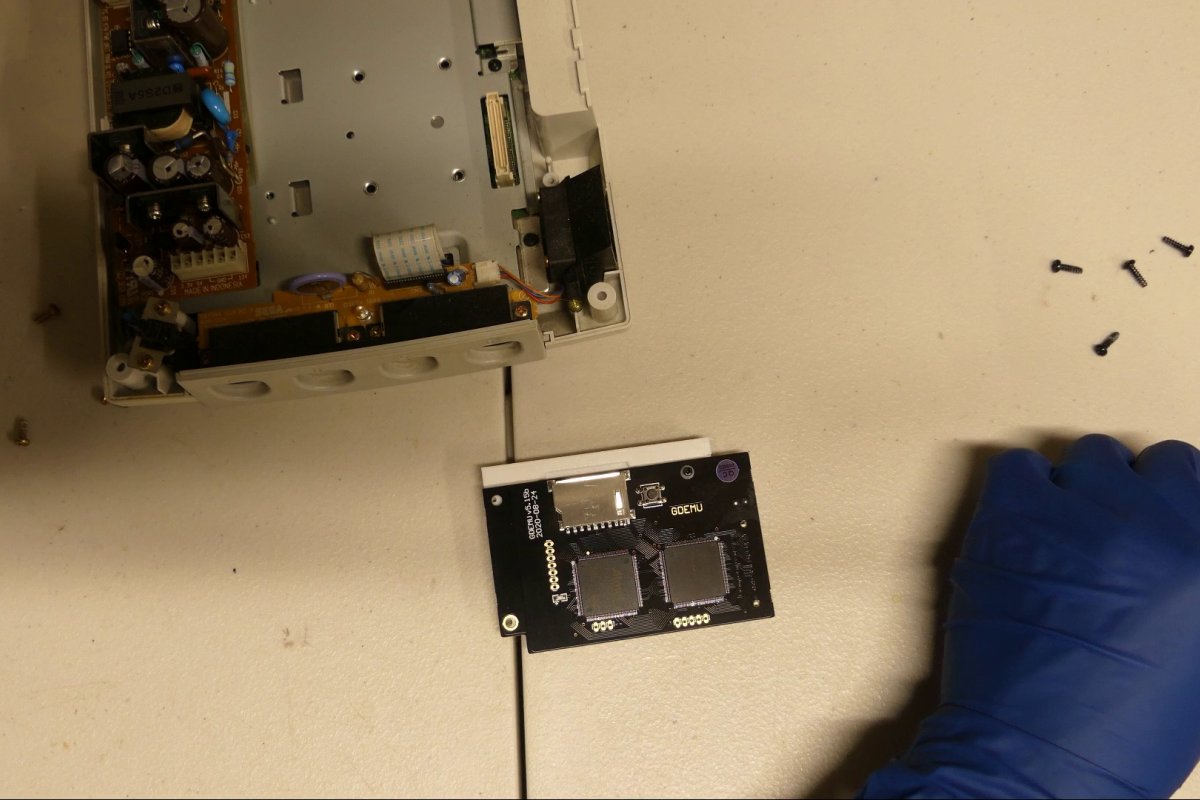
For those that are unfamiliar with the GDEMU it is a form of “ODE” or optical drive emulator for the Sega Dreamcast. It allows you to play your games from an SD card instead of using the original disk. Since most disk drives are starting to fail or need repair at this point in time this is one of the ways to keep your Dreamcast alive. The GDEMU is not the only ODE for the Dreamcast but it is by far the cheapest and has 100% compatibility with all games. You can buy the original GDEMU from the person that invented it here. They are released in batches every once in a while but as of writing this it has been at least 2 months since the last very small batch was released. Since the GDEMU came out it has been copied by some Chinese company and now there are “clone” GDEMUs available. These are all over the internet now and are very often the only GDEMUs that are available at any given time. There are good and bad sides to that coin since now they are actually available to most people and fairly cheap but they are based on a copied design that gives no credit or money to the original developer. Our experience with the clones is that they work just as well as the originals but the firmware cannot be updated. Of course if you can get your hands on one it is absolutely best to use the authentic hardware but for the purpose of this guide either will work.

Loading games on the SD card for your GDEMU is fairly straightforward and can be accomplished by following another tutorial on this site.

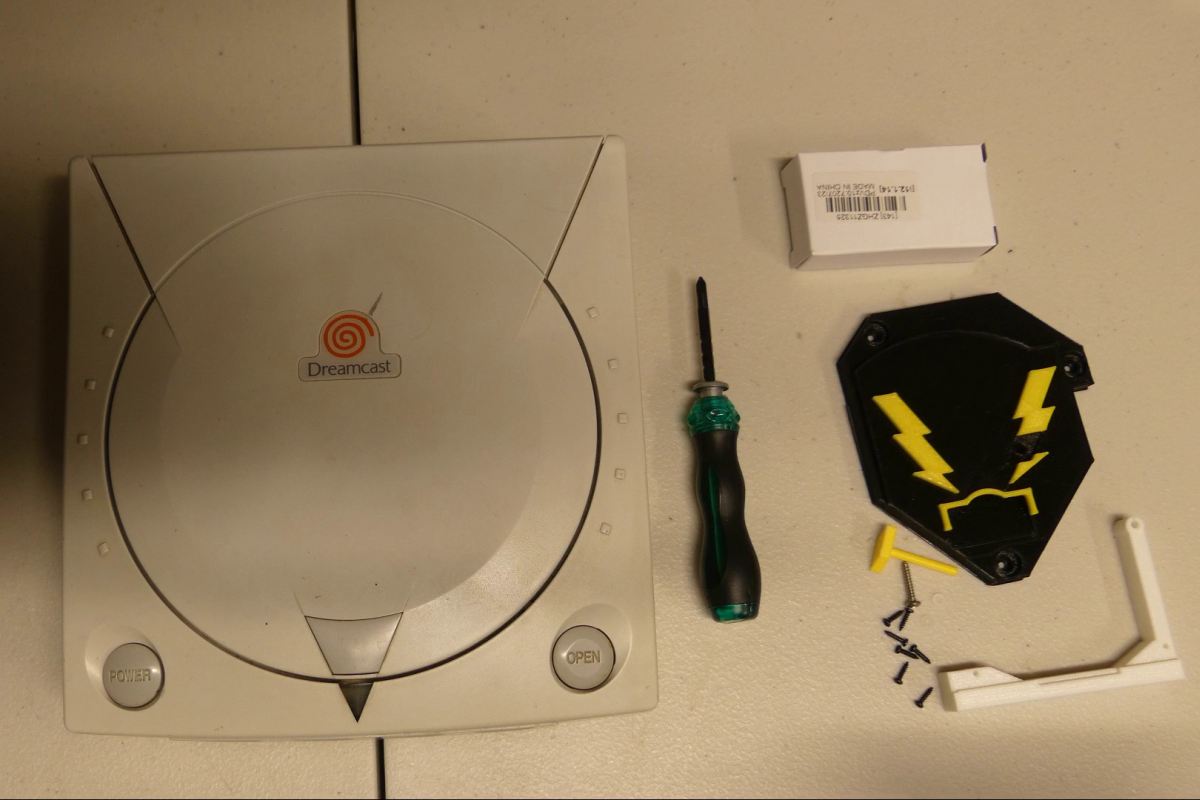
Tools Required for the Mod

  • The Sega Dreamcast
  • A Phillips Screwdriver
  • A GDEMU
  • The mount and tray kit from here or here. (this tray will also work but the guide is slightly different) Any of these kits will include everything you need for the install including the screws, bracket, SD extender and whatnot.
  • Tape (optional)

*A video version is available at the bottom of the page for those that would rather follow a video.*
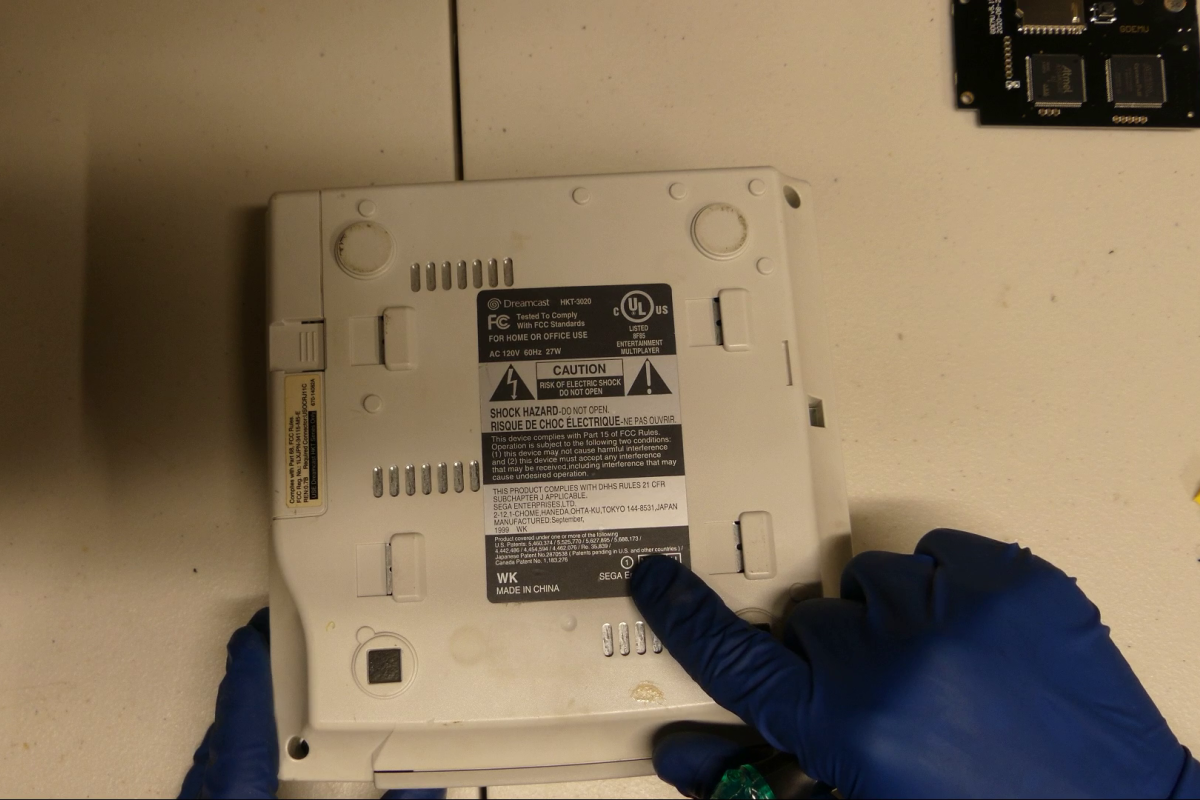
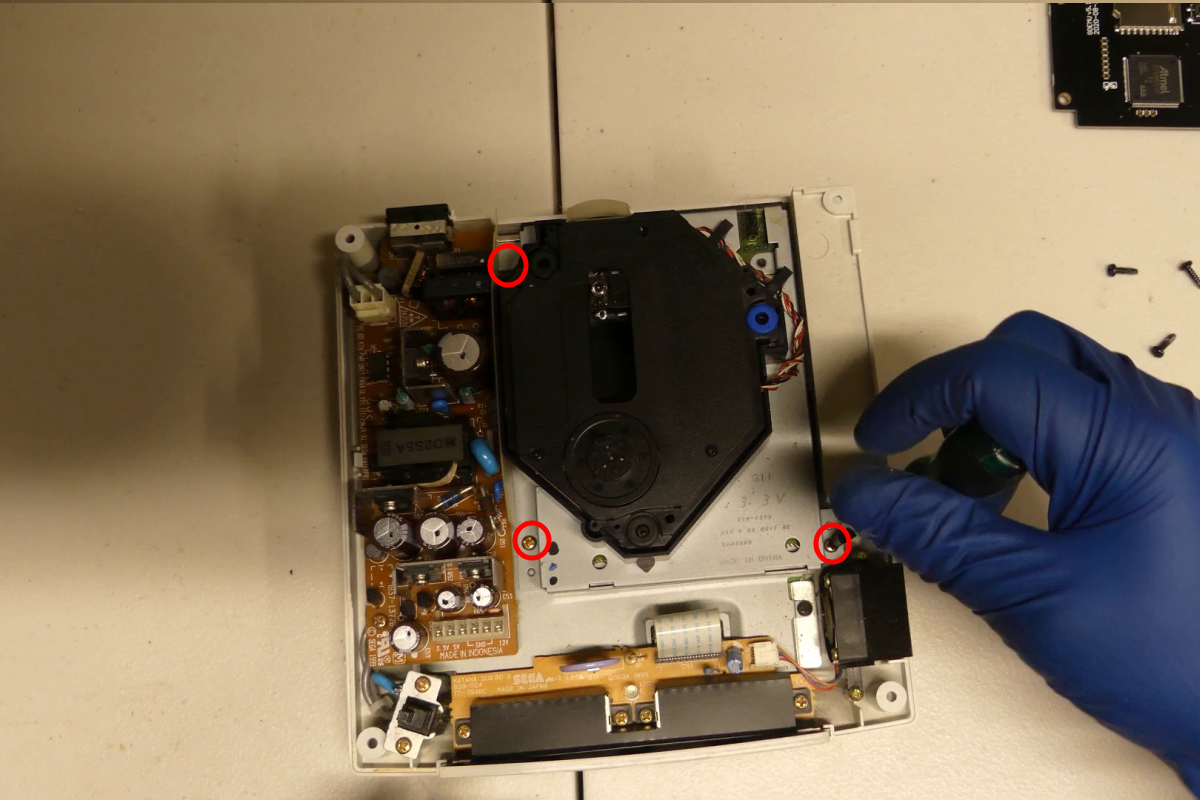
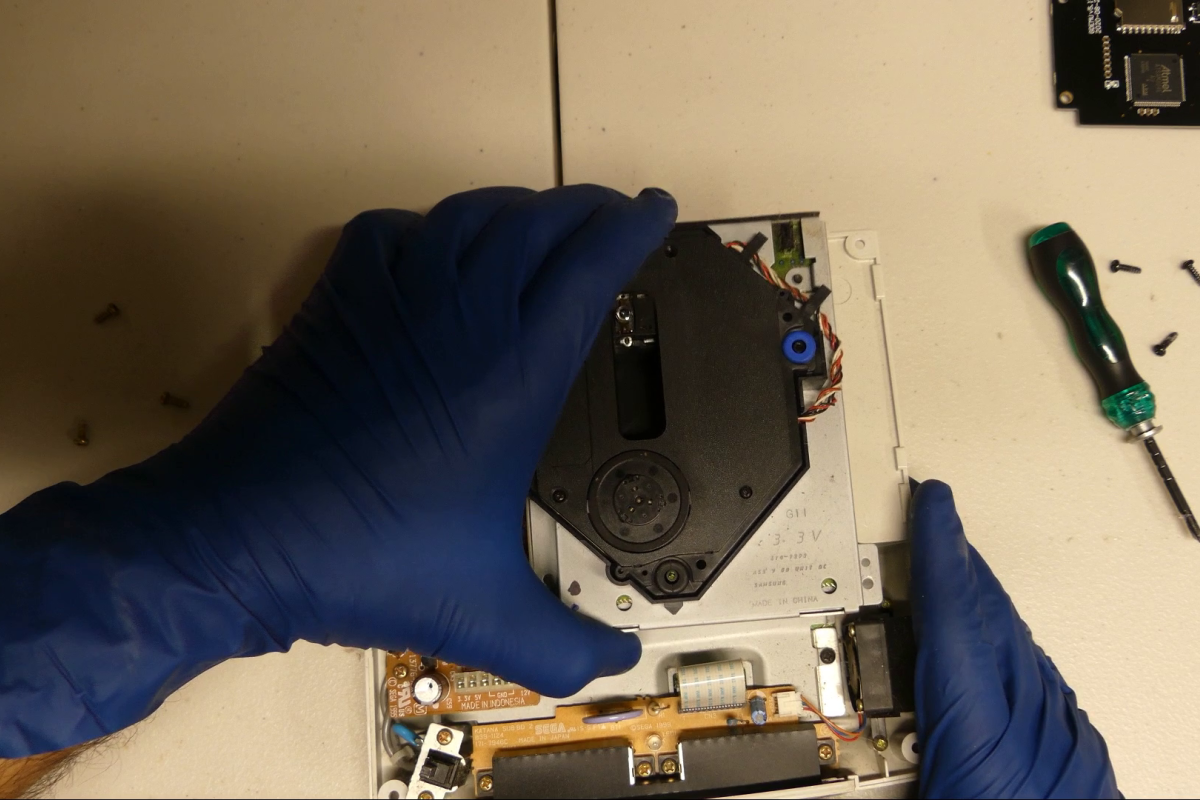
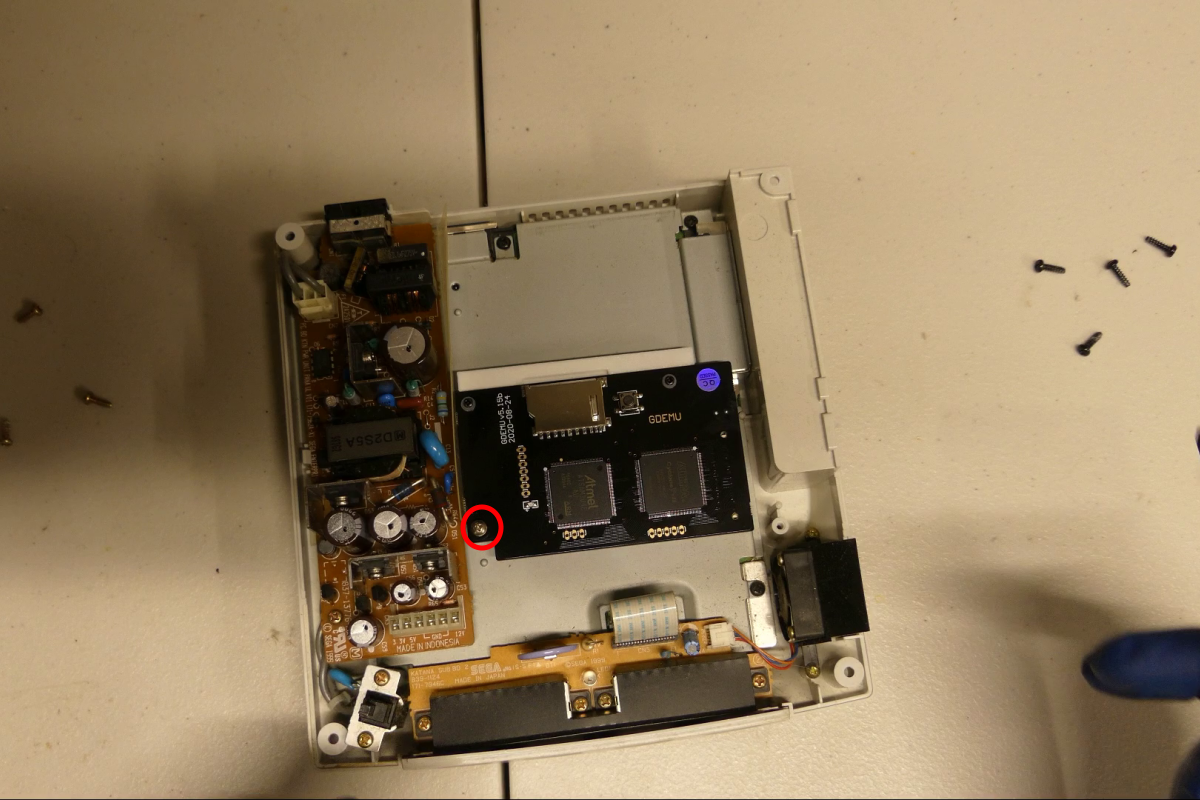
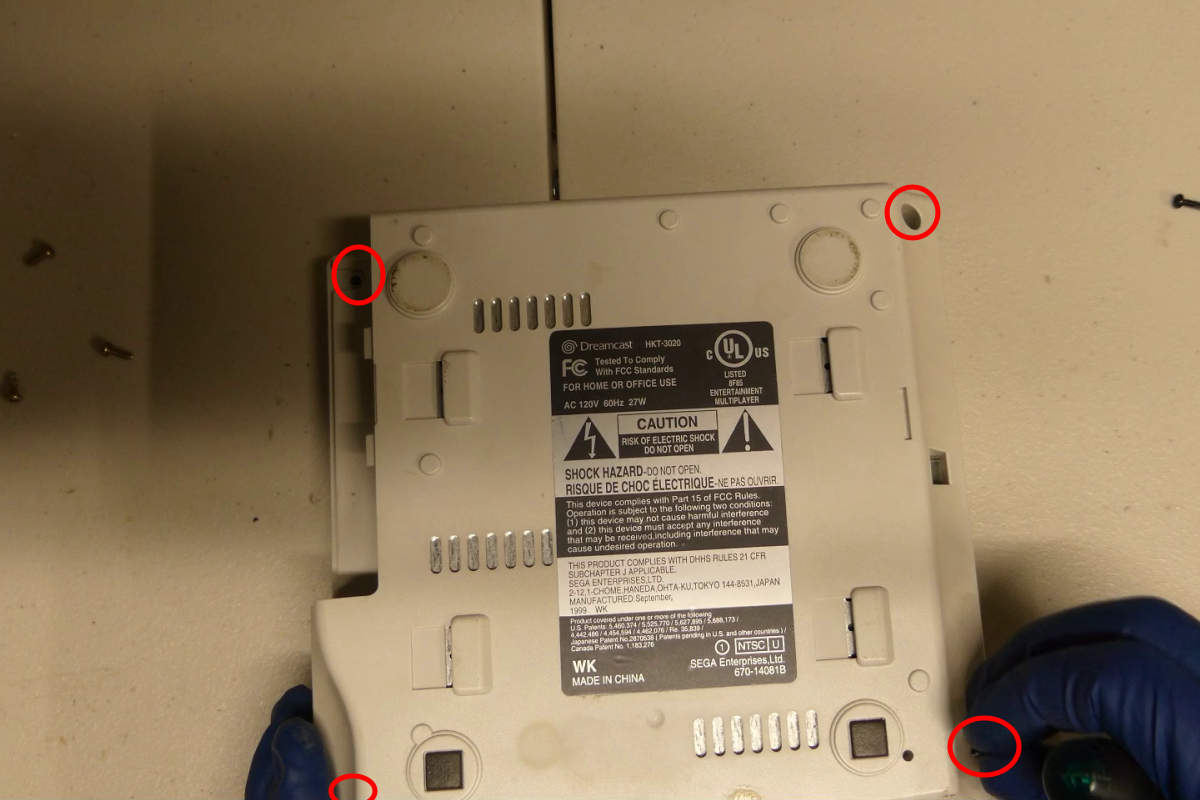
Lets Get to the Mod

Pro Tip: An easy way to follow this guide is just to click the first image and use the arrows to go through each step.

First you want to make sure you are using a version 1 Dreamcast. Check the number inside the circle. If it isn’t a 1 then it probably wont work with a GDEMU. If it is from a different region where it does not tell you on the bottom, you will need to open the console up to identify the version.
Slot the SD Extender cable into the GDEMU cover, it slides right in as long as you are putting it in right. You can use two of the small black screws to secure it into place.
Now lets open the Dreamcast. You can pull the modem out and then remove the 4 screws, one from each corner of the Dreamcast, to get the cover off.
Turn the Dreamcast over and pull the top half of the casing off. It comes right off so be careful when you flip over the console.
The inside should look like this if it is a version 1. If you have a metal fan or a ribbon cable on the disk drive, it isn’t a V1. Remove the three screws circled so you can remove the GD-Rom drive.
Once the screws are removed the disk drive lifts right out.
Now you will want to prepare the GDEMU by fixing it to the L bracket that comes with the kit. Use two small black screws along with the two washers in the top two holes in the bracket. You can start threading in the big screw into the bottom left of the bracket but don’t put it in all the way.
Slot the GDEMU into the GD-Rom disk connector. When you have it seated firmly you can screw the bottom left screw all the way in. It will line up with a hole in the Dreamcast to secure everything down.
Now you can put the 3D printed tray in place. It goes on the underside of the shell as pictured. Pop the piece in. When everything is lined up right you will feel it pop in and sink right in with a little force. Sometimes it is easier to line up the back two pegs first and then pop in the front peg.
Secure the 3D printed tray in with the remaining three small black screws.
Now you may want to tidy up the cable with some tape. Just fold it back and forth a bit and tape it. The reasoning behind the long cable is explained in the video.
Seat the SD extender end into the slot. You can also put a piece of tape here as well but be careful not to tape over the button (circled in the photo).

You can rotate the lid counter clockwise to put a twist in the cable. That will make it stay on the left side of the console when you put everything back together to keep it out of the way of the button.
Put the cover back on your Dreamcast and you can put in the button to make sure the cable isn’t in the way of the button. You may want to trim 1-2mm off the button depending on which version of GDEMU you have, this is easily done with scissors or a knife.
Put back the screws in the bottom, plug in the modem and you are done! Now time to load that SD card!

The Video Version

Close Bitnami banner
Bitnami